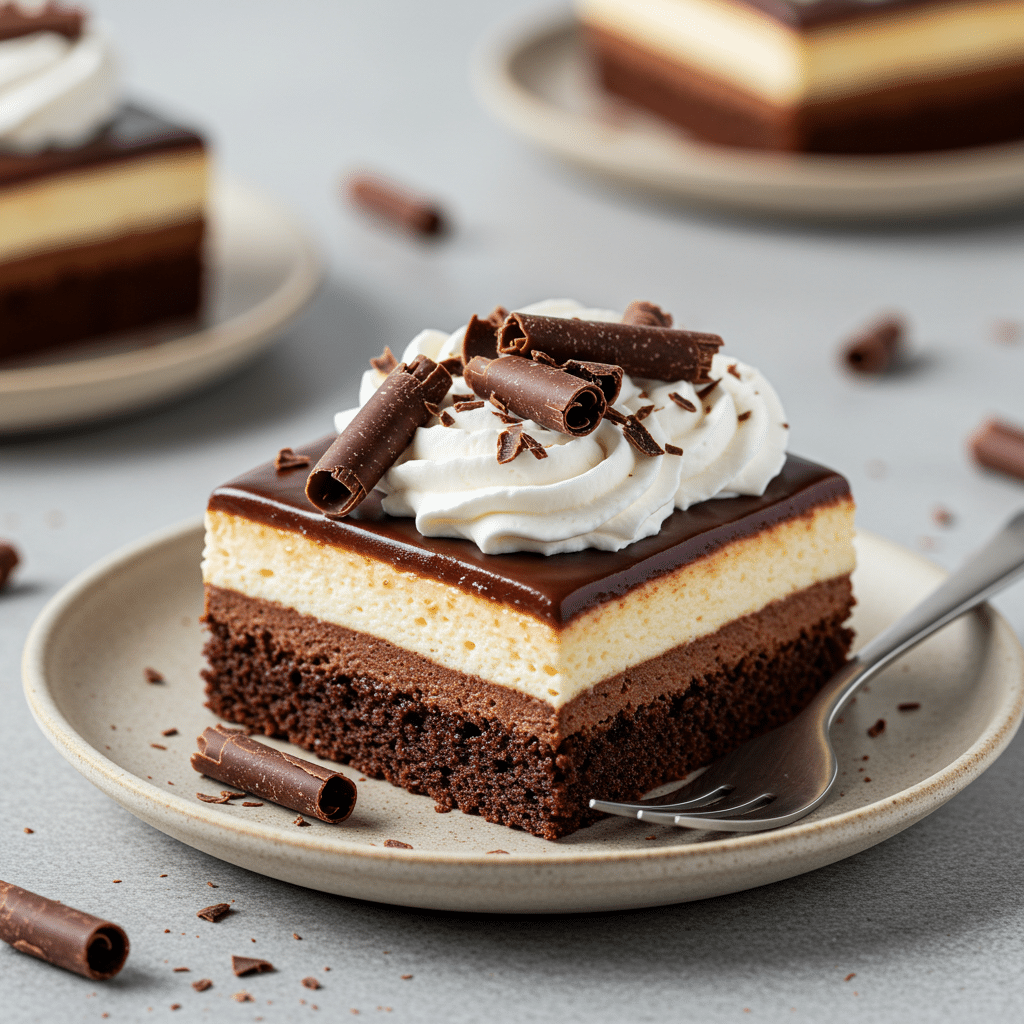
The easy no-bake brownie fridge cake is one of those rare desserts that feels indulgent yet surprisingly effortless. With a fudgy brownie base, creamy cheesecake-style filling, layers of chocolate and vanilla pudding, and a fluffy whipped topping, it’s a treat that’s both visually appealing and delicious.
The refrigerator does all the work, setting the layers into a decadent chilled dessert that’s perfect for hot days, potlucks, or when you simply want to prepare something ahead of time. In this guide, you’ll learn how to make this cake from start to finish, discover flavor variations, and pick up tips for perfect results every time.
Why No-Bake Brownie Cakes Are Popular
A Layered Dessert Without Fuss
The beauty of a refrigerator cake is that it doesn’t rely on complicated steps or precise timing. The brownie base gives it substance, while the cream cheese, pudding, and whipped topping bring balance and creaminess. Refrigeration sets the layers into a sliceable dessert, no intricate decorating required.
📄 Want to keep this recipe for later? Download your printable PDF version now and start cooking anytime!
📥 Download Recipe PDF✅ Print-friendly • 🕒 Save for later • 📱 Mobile-accessible
💡 Want more like this? Subscribe for weekly printable recipes!
Ideal for Any Gathering
This cake shines at gatherings because it can be made ahead and sliced neatly when chilled. Guests love the layered presentation, and hosts appreciate the simplicity. Much like a moist flavorful citrus olive oil cake, it demonstrates that elegance in desserts can come from simple, thoughtful preparation.
Print
Easy No-Bake Brownie Fridge Cake
- Total Time: 2 hours 30 minutes (includes chilling)
- Yield: 12–16 servings 1x
- Diet: Vegetarian
Description
An easy no-bake brownie fridge cake layered with fudgy brownies, creamy cheesecake filling, silky pudding, and whipped topping. Perfect chilled dessert for gatherings.
Ingredients
For the Brownie Base:
1 box brownie mix (9×13 pan size)
1 extra-large egg (adds richness)
For the Cream Cheese Layer:
1 package cream cheese (8 oz), softened
1 cup powdered sugar
1 container whipped topping (8 oz)
For the Pudding Layer:
1 package chocolate instant pudding (3 oz)
1 package vanilla instant pudding (3 oz)
3 1/2 cups milk
For the Topping:
1 container whipped topping (8 oz)
1 Hershey bar (shavings) or chocolate syrup drizzle
Instructions
1. Preheat oven according to brownie mix directions. Mix batter with one extra-large egg and bake in a greased 9×13 pan for 25–30 minutes. Cool completely.
2. Beat cream cheese until smooth. Add powdered sugar and mix. Fold in whipped topping and spread over cooled brownies.
3. Whisk chocolate pudding, vanilla pudding, and milk until thickened. Spread over cream cheese layer.
4. Top with remaining whipped topping. Smooth with spatula.
5. Garnish with Hershey shavings or drizzle chocolate syrup.
6. Cover and refrigerate for at least 2 hours before slicing and serving.
Notes
Brownies must be cooled completely before layering to prevent melting.
Chill overnight for the best texture and clean slices.
Freeze slices without topping for up to 2 months.
Add variations like Oreos, peanut butter, or berries for creative twists.
- Prep Time: 30 minutes
- Cook Time: 30 minutes
- Category: Dessert
- Method: Bake + Refrigerate
- Cuisine: American
Nutrition
- Serving Size: 1 slice
- Calories: 340
- Sugar: 27g
- Sodium: 160mg
- Fat: 18g
- Saturated Fat: 10g
- Unsaturated Fat: 6g
- Trans Fat: 0g
- Carbohydrates: 38g
- Fiber: 2g
- Protein: 5g
- Cholesterol: 75mg
Ingredients for Success
For the Base and Cream Layer
- 1 box brownie mix (9×13 pan size)
- 1 extra-large egg (adds richness)
- 1 package cream cheese (8 oz), softened
- 1 cup powdered sugar
- 1 container whipped topping (8 oz)
The base delivers fudginess, while the cream cheese mixture offers a tangy, creamy layer that contrasts with the chocolate.
For the Pudding and Topping
- 1 package chocolate instant pudding (3 oz)
- 1 package vanilla instant pudding (3 oz)
- 3 1/2 cups milk
- 1 container whipped topping (8 oz)
- 1 Hershey bar for shavings or chocolate syrup drizzle
The pudding layers provide silkiness and depth, and the whipped topping ensures the dessert feels light. Garnishes make it look polished.
Step-by-Step Instructions
Preparing the Brownie Base
Preheat the oven according to the brownie mix directions. In a mixing bowl, prepare the batter, adding the extra-large egg for richness. Grease a 9×13-inch pan, pour in the batter, and bake 25–30 minutes. Allow to cool completely. Cooling prevents the cream cheese layer from melting when spread over the base.
Building the Cream and Pudding Layers
For the cream cheese layer, beat softened cream cheese until smooth, then add powdered sugar. Fold in whipped topping and spread over cooled brownies. For the pudding, whisk chocolate pudding, vanilla pudding, and milk until thickened. Spread evenly on top. Finish with the second container of whipped topping, smoothing with a spatula. Garnish with Hershey shavings or drizzle chocolate syrup before refrigerating for at least 2 hours.
Tips for Best Results
Baking and Cooling the Base
Brownies form the structural foundation, so they must be cooled thoroughly. Baking one day in advance and chilling overnight creates a firm, sliceable base. Adding the extra-large egg makes them richer and sturdier.
Chilling the Cake
Refrigeration is crucial for clean slices and flavor development. Chill at least 2 hours, but overnight is best. Each layer firms up without becoming dense, giving the cake its signature texture.
Variations to Try
Fun Flavor Options
- Oreo Brownie Fridge Cake: Swap chocolate pudding for cookies-and-cream pudding, top with crushed Oreos.
- Peanut Butter Brownie Fridge Cake: Swirl melted peanut butter into the pudding, top with Reese’s cups.
- Mocha Brownie Fridge Cake: Add espresso powder to pudding, drizzle with caramel sauce.
- Berry Brownie Fridge Cake: Replace chocolate pudding with strawberry pudding, garnish with fresh berries.
Dietary Adjustments
Use sugar-free pudding and whipped topping for a lighter version. Swap Greek yogurt for cream cheese to reduce fat. Gluten-free brownie mixes adapt well for dietary needs.
Serving Ideas
Simple Presentation
Cut into squares and serve chilled. Sprinkle cocoa powder or chocolate curls on each slice for a polished look. A handful of fresh berries adds brightness and contrast.
Pairing Suggestions
Pair this cake with vanilla ice cream, fresh fruit, or salted caramel drizzle. Coffee or black tea make great drink pairings, while roasted nuts or espresso whipped cream add texture and depth.
Tips for Perfect Slices and Storage
Cutting Cleanly
Always chill thoroughly before slicing. Use a sharp knife dipped in hot water, wiping between cuts. This keeps layers intact for a professional presentation.
Storing the Cake
Store covered in the refrigerator for up to 5 days. For longer storage, freeze in individual slices without topping. Thaw overnight in the refrigerator before serving.
Frequently Asked Questions
Can I make this cake ahead of time?
Yes, it tastes even better after chilling overnight. The layers firm up and flavors meld beautifully.
Do I need to use instant pudding?
Instant pudding is best because it sets quickly and firmly. Cooked pudding can work if cooled completely.
Can I use homemade brownies instead of boxed mix?
Absolutely. Using high-quality cocoa powder in a scratch recipe elevates the dessert even more.
Why did my cream layer turn soft?
The brownies may not have cooled fully before layering. Ensure they are completely cooled.
Can I swap whipped topping for whipped cream?
Yes, but stabilize whipped cream with gelatin or mascarpone so it holds shape in the refrigerator.
Can I make individual servings?
Yes, layer ingredients in jars or cups for parfait-style desserts. Great for parties.
Does it freeze well?
Yes, but freeze without whipped topping. Add topping after thawing for best results.
What drinks pair well with this cake?
Coffee, milk, or dessert wines pair beautifully. For a twist, try espresso martinis or iced lattes.
Conclusion
The easy no-bake brownie fridge cake is a dream dessert: layers of fudgy brownie, tangy cream cheese, silky pudding, and fluffy whipped topping. Simple to prepare yet rich in flavor, it’s perfect for gatherings or family dinners. Just like the bright balance of a moist flavorful citrus olive oil cake, this recipe shows that thoughtful layering creates unforgettable results. With endless variations and make-ahead convenience, it’s destined to become a household favorite.

