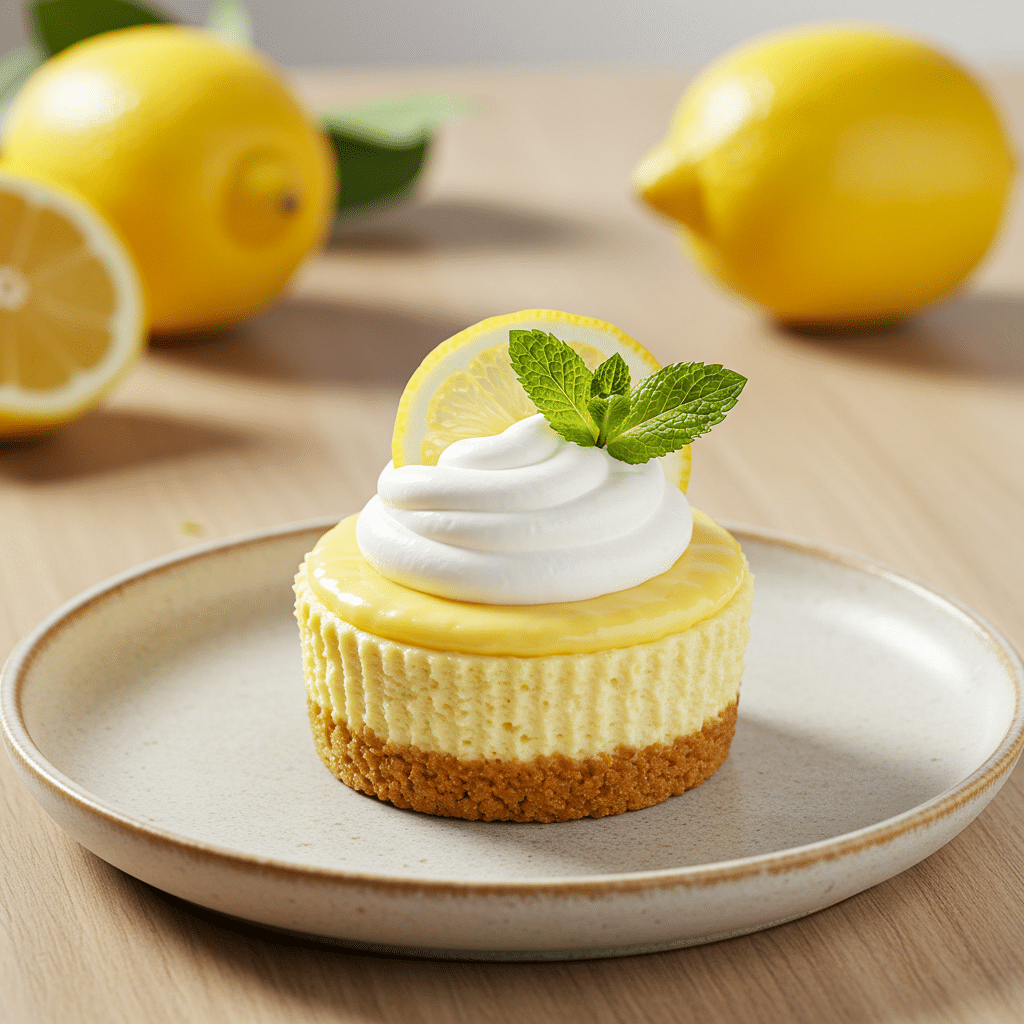
Bite-sized lemon cheesecakes are a refreshing, crowd-pleasing dessert that combines creamy cheesecake filling with a zesty citrus twist. These miniature treats are baked in muffin tins with a crunchy graham cracker crust, making them as convenient as they are delicious. They’re portioned for easy serving and can be customized with toppings ranging from whipped cream to fresh berries.
Perfect for parties, afternoon teas, or after-dinner indulgence, these little cheesecakes are proof that good things come in small packages. In this guide, you’ll learn everything from ingredients and preparation to baking tips, decoration ideas, serving suggestions, and creative variations.
Why Mini Cheesecakes Stand Out
The Convenience of Individual Servings
Bite-sized cheesecakes are perfect for events where guests want individual desserts without slicing into a large cake. Each portion is already sized, which makes them ideal for buffets or casual gatherings. Cupcake liners also make them easy to transport, serve, and enjoy with minimal cleanup.
📄 Want to keep this recipe for later? Download your printable PDF version now and start cooking anytime!
📥 Download Recipe PDF✅ Print-friendly • 🕒 Save for later • 📱 Mobile-accessible
💡 Want more like this? Subscribe for weekly printable recipes!
The Brightness of Lemon
Lemon adds tang and freshness to balance the richness of cream cheese. The combination of lemon juice and zest ensures each bite is both creamy and refreshing. Much like the layered citrus notes in a moist flavorful citrus olive oil cake, lemon provides depth and keeps the dessert light and inviting.
Print
Bite-Sized Lemon Cheesecakes
- Total Time: 45 minutes + chilling
- Yield: 12 servings 1x
- Diet: Vegetarian
Description
Bite-sized lemon cheesecakes with a graham cracker crust and creamy lemon filling. Perfect for parties, portioned desserts, or make-ahead treats.
Ingredients
Crust:
1 cup graham cracker crumbs
1/4 cup melted butter
Filling:
16 oz cream cheese, softened
1/2 cup sugar
2 eggs
1/4 cup sour cream
2 tbsp lemon juice
1 tsp lemon zest
1 tsp vanilla extract
Instructions
1. Preheat oven to 325°F (160°C). Line muffin tin with cupcake liners.
2. Mix graham cracker crumbs with melted butter. Press into muffin cups.
3. Beat cream cheese and sugar until smooth. Add eggs one at a time.
4. Stir in sour cream, lemon juice, zest, and vanilla. Mix until combined.
5. Spoon filling over crusts and bake 20–25 minutes until set but slightly wobbly.
6. Cool at room temperature, then refrigerate at least 2 hours before serving.
Notes
Top with lemon slices, zest, whipped cream, or fresh berries.
Freeze individually for up to 2 months.
Pre-bake crusts for 5 minutes for extra crunch.
- Prep Time: 20 minutes
- Cook Time: 25 minutes
- Category: Dessert
- Method: Baking
- Cuisine: American
Nutrition
- Serving Size: 1 mini cheesecake
- Calories: 210
- Sugar: 14g
- Sodium: 120mg
- Fat: 14g
- Saturated Fat: 8g
- Unsaturated Fat: 5g
- Trans Fat: 0g
- Carbohydrates: 17g
- Fiber: 0g
- Protein: 4g
- Cholesterol: 55mg
Ingredients for Perfect Mini Cheesecakes
Crust Ingredients
To create the buttery graham cracker base, you’ll need:
- 1 cup graham cracker crumbs
- 1/4 cup melted butter
The crumbs add sweetness and crunch, while the butter binds the mixture together, forming a solid foundation for the creamy filling.
Filling Ingredients
For the luscious cheesecake filling, gather:
- 16 oz cream cheese, softened
- 1/2 cup sugar
- 2 eggs
- 1/4 cup sour cream
- 2 tbsp lemon juice
- 1 tsp lemon zest
- 1 tsp vanilla extract
These ingredients combine to create a smooth, tangy filling. The cream cheese provides structure, sugar balances acidity, eggs hold everything together, and sour cream adds creaminess. Lemon juice and zest bring freshness, while vanilla rounds out the flavor.
How to Prepare the Recipe
Making the Crust
- Preheat oven to 325°F (160°C).
- Mix 1 cup graham cracker crumbs with 1/4 cup melted butter until the crumbs resemble damp sand.
- Divide evenly among muffin tin cups lined with paper liners. Press firmly into the bottoms to create compact crusts.
Preparing the Filling
- Beat 16 oz softened cream cheese with 1/2 cup sugar until smooth.
- Add 2 eggs, one at a time, mixing after each addition.
- Stir in 1/4 cup sour cream, 2 tbsp lemon juice, 1 tsp lemon zest, and 1 tsp vanilla extract. Mix until combined.
- Spoon filling evenly over the prepared crusts.
Bake for 20–25 minutes until the centers are set but slightly wobbly. Let them cool at room temperature, then refrigerate for at least 2 hours before serving.
Baking and Cooling Tips
Avoiding Overbaking
The secret to irresistibly creamy mini cheesecakes lies in knowing when to pull them from the oven. Unlike dense cakes that can withstand a little extra time in the heat, cheesecakes become dry and crumbly if baked too long. The trick is to watch the centers carefully, when they’re set around the edges but still have a slight jiggle in the middle, they’re ready. Don’t panic if they look a little soft; they’ll continue to cook from residual heat and firm up as they cool.
Overbaking not only ruins the texture but can also cause unsightly cracks to form across the surface. Another tip is to avoid opening the oven door repeatedly, which lets heat escape and can disrupt baking.
If you’re unsure, gently tap the side of the muffin tin; the cheesecakes should wobble slightly but not slosh. Using an oven thermometer is also a good practice, since many home ovens run hotter or cooler than their dials suggest. With these precautions, you’ll achieve that signature creamy, melt-in-your-mouth consistency every time.
Cooling and Chilling
Cooling is just as important as baking when it comes to achieving smooth, flawless mini cheesecakes. A sudden temperature shock—like moving hot cheesecakes straight into the fridge—can cause cracks or make the centers collapse. Instead, allow them to rest at room temperature for about 30 minutes. This gradual cooling process lets the filling settle evenly without structural damage.
After they’ve reached room temperature, transfer them to the refrigerator, uncovered, for the first hour. This step prevents condensation from forming on the tops, which can ruin both appearance and texture. After the first hour, cover the cheesecakes loosely with plastic wrap or foil and let them chill for at least two hours, though overnight is even better.
The longer resting period allows the lemon flavor to develop fully, making them more vibrant and tangy. Proper chilling also ensures they hold their shape when unwrapped, topped, and served. Think of chilling as the final stage of baking—it’s the quiet period that transforms them from good to exceptional.
Decorating Ideas
Simple Garnishes
Classic toppings include a thin lemon slice, a sprinkle of zest, or a dollop of whipped cream. These add freshness without overshadowing the cheesecake.
Creative Toppings
For more flair, try fresh raspberries, blueberries, or mint sprigs. Drizzle with raspberry sauce or white chocolate for a gourmet look. Crushed pistachios or almonds add crunch and contrast.
Serving and Storage
How to Serve
Serve chilled for the best texture. Mini cheesecakes are ideal for dessert platters, picnics, or tea parties. Their size makes them easy to enjoy without utensils, and their bright lemon flavor pairs well with both casual and formal meals.
Storage Options
Refrigerate in an airtight container for up to 5 days. For longer storage, wrap each cheesecake individually in plastic wrap and freeze in a freezer-safe container for up to 2 months. Thaw overnight in the refrigerator before serving.
Tips and Variations
Flavor Variations
Swap lemon with lime juice and zest for a tropical variation. Use orange zest for a sweeter, milder note. Add swirls of raspberry or blueberry jam to the filling before baking for a fruit-forward twist.
Adjustments for Dietary Needs
Use gluten-free graham crackers for the crust if needed. Replace sour cream with Greek yogurt for a lighter version. For reduced sugar, use a sugar substitute designed for baking without compromising texture.
Frequently Asked Questions
Can I make mini cheesecakes ahead of time?
Yes. These cheesecakes are perfect for preparing ahead, as they taste better after chilling overnight. The flavors deepen, and the texture firms up, making them ideal for parties and gatherings.
Do I need cupcake liners?
Liners are highly recommended because they make removal easy and keep the crust intact. Without liners, grease the tin thoroughly and allow the cheesecakes to cool completely before removal.
Why did my cheesecakes sink in the middle?
Sinking happens when cheesecakes are underbaked or cooled too quickly. Bake until set, then let them cool gradually before refrigerating to avoid collapse.
Can I use bottled lemon juice instead of fresh?
Fresh lemon juice is best for flavor, but bottled can work in a pinch. Keep in mind that bottled juice lacks brightness and can sometimes taste bitter.
How do I keep crusts from getting soggy?
Press crumbs firmly into muffin cups to compact them. For extra crunch, pre-bake the crusts for 5 minutes before adding filling.
Can I freeze mini cheesecakes?
Yes. Wrap each tightly in plastic wrap and store in a freezer-safe container for up to 2 months. Thaw in the fridge before serving.
What’s the best way to transport them?
Keep them chilled in a covered container. If traveling long distances, place the container in a cooler with ice packs to maintain freshness.
Can I double the recipe?
Yes, simply double the ingredients and use two muffin pans. Bake at the same temperature, but monitor closely, as baking time may vary slightly.
How can I add extra lemon flavor?
Add more zest, a teaspoon of lemon extract, or garnish with candied lemon slices for an extra burst of citrus.
Do they taste better fresh or the next day?
They taste even better the next day after chilling. The texture becomes creamier, and the lemon flavor is more pronounced.
Conclusion
Bite-sized lemon cheesecakes are proof that small desserts can deliver big flavor. With a crunchy graham cracker base, tangy lemon filling, and endless topping options, they’re versatile enough for any occasion. They’re easy to make, store, and serve, making them one of the most practical yet impressive desserts you can prepare.
Just like the refreshing flavors of a moist flavorful citrus olive oil cake, these cheesecakes show how citrus can transform a creamy dessert into something light, vibrant, and unforgettable. Serve them at your next gathering, and they’ll surely disappear in no time.

