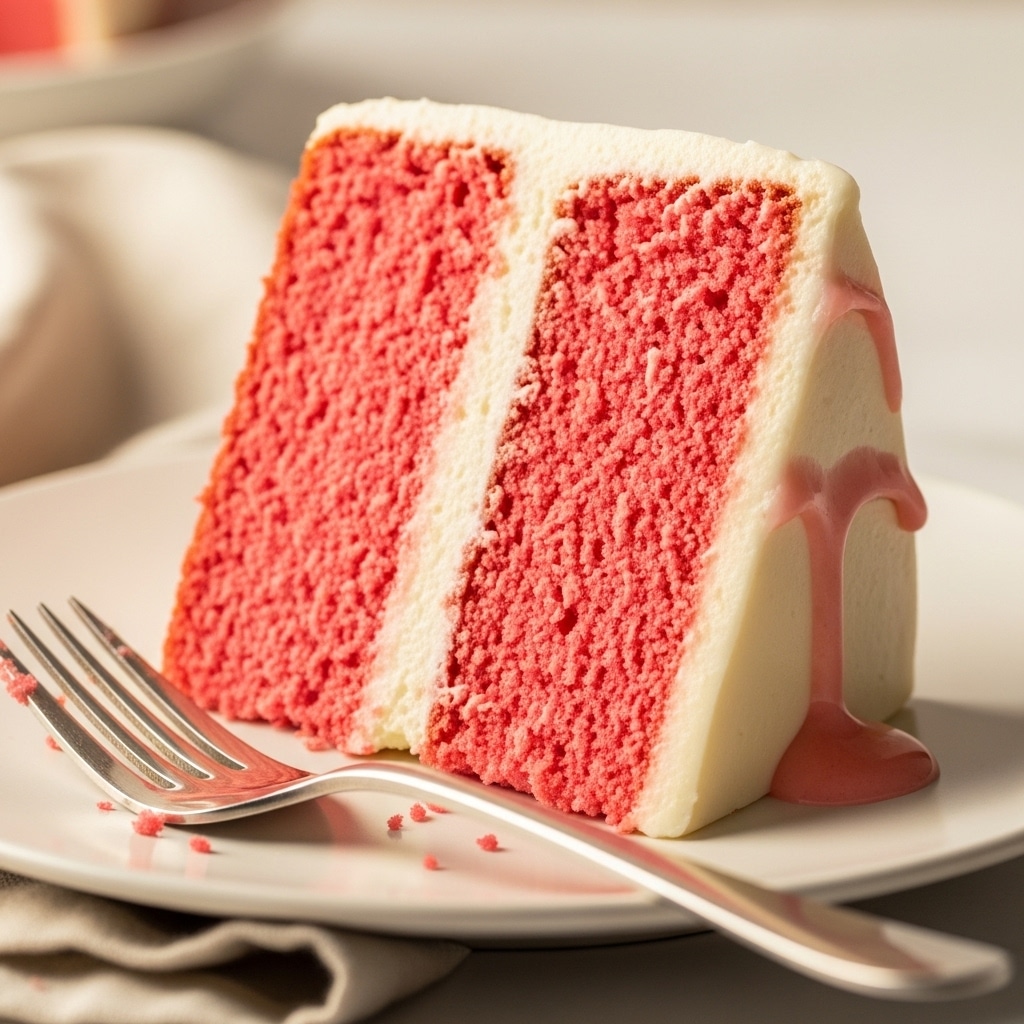
Sometimes you need a Delicious Pink Velvet Dream Cake, and you need it now. This recipe is the answer. It is a quick homemade treat that delivers all the stunning color and moist, tender crumb of a classic velvet cake, but in a simplified, approachable way. This is not a fussy, all-day baking project. It is a straightforward, from-scratch recipe that is perfect for a last-minute celebration, a weeknight dessert craving, or any time you want to make a “dream cake” without the stress. It is quick, it is easy, and it is undeniably delicious.
What Makes This “Dream Cake” So Quick and Easy?
This recipe is built for speed and simplicity. We have streamlined the process to get you from ingredients to a delicious pink velvet dream cake as fast as possible, without sacrificing the homemade quality.
A Simple, One-Bowl Mixing Method
This recipe uses a straightforward, “all-in-one” style of mixing. You will cream the butter and sugar, add the wet ingredients, and then mix in the dry. There is no complex reverse creaming or separating of eggs. This simple, classic method is quick, easy to follow, and results in one dirty bowl, not three. It is the perfect approach for a quick homemade treat.
📄 Want to keep this recipe for later? Download your printable PDF version now and start cooking anytime!
📥 Download Recipe PDF✅ Print-friendly • 🕒 Save for later • 📱 Mobile-accessible
💡 Want more like this? Subscribe for weekly printable recipes!
Using All-Purpose Flour
While some velvet cakes require specialty cake flour, this easy recipe is designed to work perfectly with standard all-purpose flour. This makes it a true “pantry-staple” dessert. You do not need to make a special trip to the store for a specific flour. This accessibility is key to making it a genuinely quick and easy homemade treat.
Print
Delicious Pink Velvet Dream Cake: Quick Homemade Treat
- Total Time: 1 hour 5 minutes
- Yield: 1 two-layer 8-inch cake
Description
A Delicious Pink Velvet Dream Cake that’s a quick homemade treat. This easy recipe uses all-purpose flour and a simple mixing method, paired with a quick strawberry frosting.
Ingredients
For the Cake:2 ½ cups All-purpose flour1 ¼ cups Granulated sugar1 cup Unsalted Butter, softened1 cup Buttermilk3 large Eggs1 tablespoon Vanilla extract1 ½ teaspoon Baking powder½ teaspoon Baking soda⅛ teaspoon SaltPink gel coloringFor the Frosting & Decoration:2 cups Strawberry frosting2 cups Fresh strawberries, washed, cut into small pieces1 cup Shredded coconut
Instructions
1. For the Cake:2. Preheat oven to 350°F. Grease and flour two 8-inch round pans (or one heart-shaped pan).3. In a large mixing bowl, add the softened butter and sugar. Cream together with an electric mixer until light and fluffy.4. Add the eggs, vanilla extract, buttermilk, and pink gel coloring. Mix until smooth.5. In a separate bowl, whisk together the flour, baking powder, baking soda, and salt.6. Add the dry ingredients to the wet mixture and mix until smooth. Do not over-mix.7. Pour the batter into the prepared pan(s).8. Bake for 40-45 minutes, or until a toothpick inserted in the center comes out clean.9. Allow the cake to cool completely.10. 11. For Assembly:12. If using one pan, cut the cooled cake in half horizontally.13. Place the bottom layer on a serving plate.14. Fill it with strawberry frosting and top with some of the fresh strawberry pieces.15. Place the other half of the cake on top.16. Frost the entire cake with the remaining strawberry frosting.17. Cover the sides of the cake with shredded coconut.18. Decorate the top of the cake with more fresh strawberries and sprinkle with coconut.
Notes
This cake is designed to be quick and easy, using all-purpose flour. For a quick buttermilk substitute, add 1 tbsp of lemon juice to 1 cup of milk and let it sit for 5 minutes.
- Prep Time: 20 minutes
- Cook Time: 45 minutes
- Category: Dessert
- Method: Baking
- Cuisine: American
Nutrition
- Serving Size: 1 slice
- Calories: 520 kcal
- Sugar: 65 g
- Sodium: 250 mg
- Fat: 28 g
- Saturated Fat: 18 g
- Unsaturated Fat: 0 g
- Trans Fat: 0 g
- Carbohydrates: 64 g
- Fiber: 2 g
- Protein: 5 g
- Cholesterol: 105 mg
The Key Ingredients for a Quick, Moist Cake
Even though this recipe is fast, it does not skimp on the ingredients that create that signature velvet texture. This is how we get a delicious result in record time.
The Power of Buttermilk
The one “must-have” ingredient for any velvet cake is buttermilk. Its acidity is non-negotiable. It reacts with the baking powder and baking soda to create an extra-fluffy, tender crumb. It also provides a slight tang that cuts the sweetness, making the cake taste balanced and delicious. If you are in a hurry and do not have any, you can make a quick substitute: add 1 tablespoon of lemon juice to 1 cup of regular milk.
Butter for Flavor, Not Oil
Many quick cakes use oil for moisture, but this delicious pink velvet dream cake uses unsalted butter. Using butter as the base provides a richer, creamier, and more complex flavor that oil simply cannot match. By creaming the butter and sugar properly, we incorporate air, which gives the cake a light, springy structure that is both moist and flavorful.
Step-by-Step to Your Pink Velvet Cake Batter
From start to finish, this batter comes together in about 10 minutes. It is the perfect quick homemade treat. First, preheat your oven to 350°F and prepare your baking pans.
Creaming and Mixing
In a large bowl, you will use an electric mixer to cream your softened butter and granulated sugar. Beat them together until the mixture is light and fluffy. This step is crucial for a light cake. Next, you will add the eggs one at a time, followed by the vanilla extract and pink gel coloring. Mix until everything is smooth and vibrantly pink.
Adding Dry Ingredients
In a separate, small bowl, just whisk together your all-purpose flour, baking powder, baking soda, and salt. You will add this dry mixture to your wet mixture in three additions, alternating with the buttermilk. Start with 1/3 of the dry, then 1/2 of the buttermilk, 1/3 of the dry, 1/2 of the buttermilk, and end with the final 1/3 of the dry. Mix on low speed just until the flour disappears. Do not overmix.
A Quick and Easy Strawberry Frosting
To make this delicious pink velvet dream cake truly special, we are pairing it with a quick strawberry frosting. This frosting uses strawberry frosting as an ingredient, which is a fantastic shortcut for infusing massive, real fruit flavor without any fuss.
The Easiest Fruit Frosting
This frosting is a dream. You will simply beat softened butter and strawberry frosting together. That’s it. It is a two-ingredient, one-step process that creates a stunningly pink, flavorful frosting.
Decorating with Strawberries and Coconut
The final touch for this quick homemade treat is the decoration. We are using fresh, sliced strawberries and shredded coconut. The fresh strawberries add a burst of juicy flavor that complements the cake, while the shredded coconut adds a wonderful, chewy texture and a beautiful, classic look.
Assembling Your Delicious Pink Velvet Dream Cake
This recipe is designed for a heart-shaped pan, but it works perfectly as a two-layer 8-inch round cake. The assembly is fast and rustic.
Filling the Layers
Once your cakes are baked and cooled, the assembly is simple. If you are making a layer cake, cut it in half horizontally. Spread a layer of your quick strawberry frosting on the bottom half, and then top it with fresh, sliced strawberries. This creates a delicious, fruity filling.
A Quick and Rustic Finish
Place the other half of the cake on top. Use the remaining frosting to cover the entire cake. You do not need a perfect, smooth finish. A rustic, swirled look is beautiful. For the final touch, press shredded coconut onto the sides of the cake and arrange more fresh strawberries on top. It is a stunning, quick homemade treat.
Storage and Serving Your Quick Treat
Because this cake is decorated with fresh fruit and a frosting, it is important to store it correctly, even if it will be eaten quickly.
Refrigeration is Best
Due to the fresh strawberries, this cake is best stored in the refrigerator. The fresh fruit can spoil if left at room temperature. Keep it in a cake carrier in the fridge for up to 2 days.
Quick Cake, Quick Prep
| Stage | What It Is | Why It’s Quick |
| The Batter | Standard “creaming” method | Uses all-purpose flour and simple steps. No complex techniques. |
| The Frosting | Two-ingredient strawberry frosting | Uses strawberry frosting as a base for instant, no-fuss fruit flavor. |
| The Decor | Fruit and Coconut | No piping bags needed. Simply press and arrange for a rustic, beautiful look. |
| The Link | Extra Ideas | For more inspiration, check out this simple purple velvet cake. |
Frequently Asked Questions
Can I use a different frosting?
Absolutely. If you are not a fan of strawberry, this cake is also delicious with a classic cream cheese frosting or a simple vanilla buttercream. This recipe is a great base for any of your favorite toppings.
Do I have to use a heart-shaped pan?
No. This recipe works perfectly in two 8-inch round cake pans or even as a 9×13-inch sheet cake. If making a sheet cake, you will not need to layer it; just frost the top and decorate.
What is the best way to get a vibrant pink color?
Always use a gel-based food coloring. Liquid food coloring from the grocery store is not concentrated and can add too much liquid. A few drops of pink gel coloring will give you a bright, beautiful “dream cake” pink without changing the batter’s consistency.
Conclusion
This Delicious Pink Velvet Dream Cake is the ultimate quick homemade treat. It proves that you do not need to spend all day in the kitchen to produce a stunning, delicious, and moist from-scratch cake. With its simple mixing method, pantry-staple ingredients, and a speedy two-ingredient frosting, this recipe is perfect for any baker in a hurry. It is a “dream” of a cake that delivers on flavor and speed.

