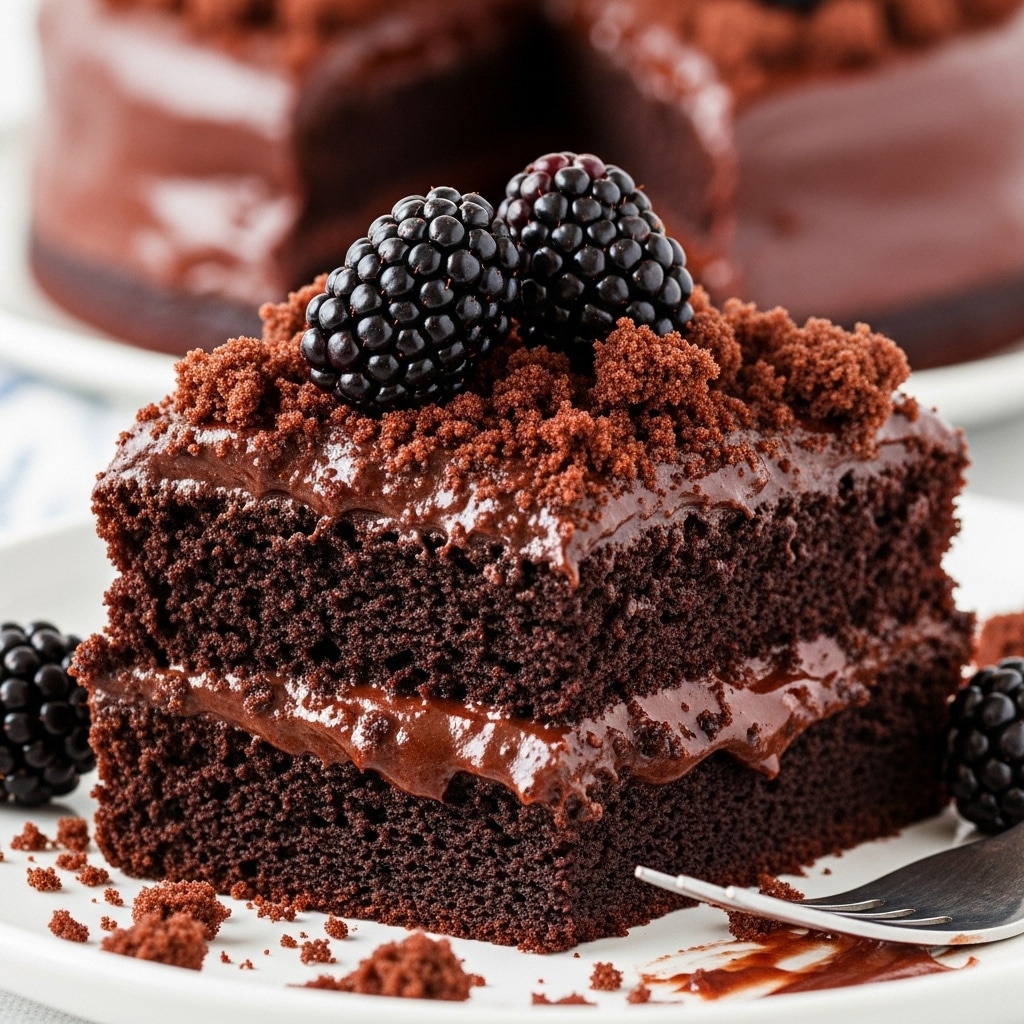
This Blackberry Blackout Cake is the easy homemade dessert recipe you have been looking for. It takes the concept of a “death by chocolate” cake and gives it a sophisticated, fruity twist. This is not just a chocolate cake; it is an experience in texture. Inspired by the iconic Brooklyn Blackout Cake, this version features layers of incredibly moist dark chocolate cake, a rich blackberry-chocolate pudding filling, and a decadent chocolate frosting. The entire masterpiece is then coated in dark chocolate cake crumbs. It is rich, it is decadent, and it is the ultimate dessert for any serious chocolate lover.
🍰 What Exactly Is a “Blackout Cake”?
The Original Brooklyn Blackout
The original Brooklyn Blackout Cake was named after the mandatory blackouts in World War II. It was famously produced by Ebinger’s bakery and featured dark chocolate cake, chocolate pudding filling, and a coating of chocolate cake crumbs.14 It was known for being intensely chocolatey and decadent. Our Blackberry Blackout Cake recipe honors this tradition but adds a bright, tart berry element.
Print
Blackberry Blackout Cake: Easy Homemade Dessert Recipe
- Total Time: 1 Hour 35 Minutes
- Yield: 12-16 Slices
Description
A homemade spin on the classic Brooklyn Blackout Cake, this easy dessert recipe features moist dark chocolate cake, a rich blackberry-chocolate pudding filling, and a coating of chocolate cake crumbs.
Ingredients
For the Dark Chocolate Cake:2 cups all-purpose flour2 cups granulated sugar3/4 cup dark cocoa powder2 tsp baking soda1 tsp baking powder1 tsp salt1 cup buttermilk1/2 cup vegetable oil2 large eggs1 tsp vanilla extract1 cup hot water (or coffee)(Note: You will use 2/3 of this batter for layers, 1/3 for crumbs)For the Blackberry-Chocolate Pudding:1 cup fresh or frozen blackberries2 cups whole milk1/2 cup granulated sugar1/4 cup cornstarch3 large egg yolks4 oz dark chocolate, chopped2 tbsp unsalted butter1 tsp vanilla extractFor the Chocolate Frosting:1.5 cups (3 sticks) unsalted butter, softened4 cups powdered sugar3/4 cup dark cocoa powder1/3 cup heavy cream1 tsp vanilla extractPinch of salt
Instructions
1. Prep: Preheat oven to 350°F (177°C). Grease and flour TWO 8-inch round pans (for layers) and ONE 9×13 pan (for crumbs).2. Make Cake Batter: Whisk dry ingredients (flour, sugar, cocoa, soda, powder, salt). In a separate bowl, whisk wet (buttermilk, oil, eggs, vanilla). Combine wet and dry. Stir in hot water (batter will be thin).3. Bake: Pour 1/3 of batter into the 9×13 pan (this is for crumbs) and bake 15-20 min. Divide remaining 2/3 of batter between the two 8-inch pans and bake 30-35 min. Cool all cakes.4. Make Pudding: Puree blackberries and strain to remove seeds. In a saucepan, whisk egg yolks, sugar, and cornstarch. Whisk in blackberry puree and milk.5. Cook Pudding: Cook over medium heat, whisking constantly, until boiling and very thick. Remove from heat.6. Finish Pudding: Stir in the chopped dark chocolate, butter, and vanilla until smooth. Press plastic wrap to the surface and chill completely (at least 2 hours).7. Make Frosting: Beat butter until fluffy. Sift in sugar and cocoa, alternating with cream and vanilla. Beat until light.8. Make Crumbs: Crumble the 9×13 cake layer onto a baking sheet.9. Assemble: Place one 8-inch cake layer on a plate. Pipe a dam of frosting around the edge. Fill with half the cold pudding.10. Layer: Add the second 8-inch layer. Pipe another dam and fill with remaining pudding.11. Frost: Cover the top and sides of the cake with the remaining chocolate frosting.12. Decorate: Press the cake crumbs all over the sides and top of the cake until fully coated. Chill until ready to serve.
Notes
Pudding Must Be Cold: Do not assemble the cake until the pudding is completely chilled and set, otherwise it will run.Frosting Dam: The dam of frosting around the edge is essential to hold in the soft pudding filling.Crumbs: Using a separate, thinner cake for the crumbs is easier than trying to trim the layers, and it gives you more crumbs to work with.
- Prep Time: 1 Hour
- Cook Time: 35 Minutes
- Category: Dessert
- Method: Baking, Stovetop
- Cuisine: American
Nutrition
- Serving Size: 1 slice
- Calories: 560
- Sugar: 50g
- Sodium: 400mg
- Fat: 30g
- Saturated Fat: 14g
- Unsaturated Fat: 0g
- Trans Fat: 0g
- Carbohydrates: 70g
- Fiber: 4g
- Protein: 8g
- Cholesterol: 100mg
The Blackout vs. Black Velvet
It is easy to confuse these two dark cakes, but they are fundamentally different. A blackout cake’s defining features are its pudding filling and crumb coating.15 A black velvet cake is defined by its smooth, “velvet” crumb (using buttermilk and vinegar) and its use of black cocoa for an Oreo-like flavor.
| Feature | Blackberry Blackout Cake | Black Velvet Cake |
| Filling | Chocolate-Blackberry Pudding | Buttercream or Cream Cheese |
| Coating | Chocolate Cake Crumbs | Smooth Frosting |
| Flavor | Rich, decadent, fruity chocolate | Smooth, milder “Oreo” flavor |
| Texture | Moist, gooey, pudding center | Tender, fine, velvety crumb |
🫐 Crafting the Blackberry-Chocolate Pudding
The Heart of the Cake
The filling is what makes this Blackberry Blackout Cake so special. This is a from-scratch stovetop pudding that combines the tartness of blackberries with the richness of dark chocolate. To make it, you will start by pureeing fresh or frozen blackberries and straining them to remove the seeds. This puree forms the liquid base of your pudding, along with milk.
Stovetop Pudding Technique
In a saucepan, you will whisk together sugar, cornstarch, and egg yolks. Slowly whisk in the blackberry puree and milk. Cook this mixture over medium heat, whisking constantly, until it comes to a boil and becomes very thick. It is crucial to keep whisking so the eggs do not scramble and the bottom does not burn. Once thick, remove it from the heat and stir in chopped dark chocolate and a little butter until smooth. Press plastic wrap directly onto the surface and chill it completely.
🍫 The Dark Chocolate Cake Layers
A Simple, Moist Cake
For a true blackout cake, you need a dark chocolate cake that is sturdy enough to hold the pudding but also moist and flavorful. You will also need to reserve some of the cake for the crumb coating. This recipe uses a straightforward dark chocolate cake, enriched with hot water (or coffee) to bloom the cocoa powder for a deeper flavor.
Preparing the Crumbs
You have two options for the essential crumb coating. You can either bake a separate, thin layer of the cake specifically to be crumbled, or you can level the tops of your main cake layers and use those trimmings. For the most authentic “blackout” look, we recommend baking the batter in three 8-inch pans. You will use two layers for the cake and one entire layer for creating the crumbs.
🛠️ Assembling Your Blackberry Blackout Cake
The Crumb-Making Process
Take your reserved cake layer or your cake trimmings. Crumble them with your hands onto a baking sheet. For extra texture, you can toast these crumbs lightly in a $300^{\circ}\text{F}$ oven for 10-15 minutes until they are slightly crisp, then let them cool. This step makes them easier to handle and adds a nice textural contrast.
Building the Layers
Place your first cake layer on a serving platter. Pipe a thick dam of chocolate frosting around the outer edge. This is a critical step; it creates a barrier to hold the pudding filling in place. Spoon half of your chilled blackberry-chocolate pudding into the center and spread it evenly. Top with your second cake layer, and repeat with another frosting dam and the remaining pudding.
🎂 Finishing with Frosting and Crumbs
The “Dirty” Frosting Coat
Place your final cake layer on top. You do not need a perfect, smooth frosting finish for a blackout cake, because it will be covered in crumbs. Apply a generous layer of your chocolate frosting all over the top and sides of the cake. This layer acts as the “glue” for the crumbs. It does not need to be perfectly smooth, just complete.
Applying the Crumb Coating
This is the fun, messy, and most important part. Place your cake (on its platter) on a large, rimmed baking sheet to catch the mess. Take handfuls of your prepared chocolate cake crumbs and press them gently onto the sides of the cake. Work your way around until the entire cake is covered. Use the remaining crumbs to cover the top of the cake, pressing them down so they adhere.
🌟 Tips for the Best Blackout Cake
Why Chilling Is Not Optional
You must let the pudding filling chill until it is completely cold and set, at least 2 hours. If you try to assemble the cake with warm pudding, it will melt the frosting dam, soak the cake layers, and slide everywhere. Patience is the key to a stable, layered blackout cake.
Frosting Variations
This cake is all about rich chocolate, so a deep chocolate buttercream is traditional. However, if you love the idea of an Oreo flavor, you could substitute the frosting from the Black velvet Cake: The Best Easy Oreo Frosting Recipe. This would create an intense, dark cake, though the flavor of the Oreo frosting might compete with the blackberry pudding.
Frequently Asked questions
Can I use a boxed cake mix?
Yes, this is a great shortcut for this recipe. You will need two boxes of a good-quality dark chocolate or “devil’s food” cake mix. Prepare them according to the package directions and bake them in three 8-inch pans. Use two for the cake and one for the crumbs.
My pudding is lumpy. What did I do?
Lumpy pudding is almost always caused by the egg yolks scrambling from the heat. To prevent this, whisk the yolks, sugar, and cornstarch together first, then slowly add the cold liquid (blackberry puree/milk). Whisk constantly over medium heat and never walk away from it.
How do I store this Blackberry Blackout Cake?
Because of the pudding and frosting, this cake must be stored in the refrigerator. Keep it in a cake carrier or covered tightly. It will last for up-w to 4-5 days. It is best served slightly chilled or at a cool room temperature.
Conclusion
This Blackberry Blackout Cake is an easy homemade dessert recipe that delivers an incredibly rich and satisfying experience. It is a true celebration of chocolate, enhanced by the bright, surprising flavor of blackberry. The combination of textures, from the moist cake to the silky pudding and the crumb-coated exterior, makes every bite interesting. It is the perfect project for a weekend, a stunning centerpiece for a celebration, and a recipe that will have everyone asking for a second slice. It is a modern, delicious update to a beloved American classic.

